Sunday 24 July 2011

Lasers fixed !

I finally managed to get a proper solution for fixing the lasers... I used a method I've seen on nuigroup.com, from AdrianH, which is very clever and also simple. As he says, "Basically, it is a piece of metal resting on 4 screw-nuts, so that it is possible to adjust height/roll easily and precisely" I couldn't explain it myself better :).


 I'll try to calibrate and make some resistance tests later, but the result feels pretty strong right now.

Sunday 17 July 2011

Design = OK

Since the beginning of this project, I wanted to create a stylish table, not an ugly massive wooden box like 1m*1m*1m with all the fans letting people see through it and all the lasers & wires poping out randomly. This is to be a real coffee table, on which you can put your glasses (I'll talk about that later), plates, dishes, but still be able at the top of your finger to change the music, or to launch a movie on the videoprojector.

I just finished the design part, and I think the result is quite nice :


On plain daylight, you can't almost see that there's a screen in it.


I still need to add some aluminium foil to even the lighting in it (I had to remove two of these panels to be able to plug all the wires in it : I'll put them back when I have the last cables I need, i.e. the Mini-DVI -> HDMI adaptator for MacBook).

That's pretty it ! I now going to find a way to have a steadier camera display, as it causes the blobs to be falsly detected...

Saturday 16 July 2011

A bit of calibration...

Since my previous tests, I've been able to work on the blob detection a bit, and try to begin a calibration. That's quite hard actually, I litteraly spent hours on all the blob detection.

My first calibration was ok, but not as good as you'd want it to be : it detects blobs but it's not always accurate, and the blobs on the sides easily break, meaning that the computer doesn't detect one blob (with a particular blob ID) and keep with it until my finger leaves the table, but it will detect several following blobs. This would result as, for example, the computer thinking I've spammed the mouse click on a file or a folder, instead of a hold click.

Here's the result :


However, I almost finished the table design, and I just need to hide the white / ugly frame around the LCD matrix. I'll use some black glossy thick paper and that'll do the trick.

Here are some pictures of the modified Ramvik table so far :


First & Second test !

Let's go for the first test !

I wanted to make sure that the camera could correctly see the whole display, so I used for that test only one laser, and didn't add the LCD Matrix.

Of course, as I only have one active laser, we can easily see some occlusion (middle finger not showing at the beginning), and the very bright window at the bottom left corner is obviously polluting the display with a massive IR lighting.

But overall, the test is a success as we can see everything properly. The Ikea Ramvik table seems to be the way to go !


For the second, test, I added the LCD matrix + the backlight. The blobs are obviously very less accurate, but I only used one laser for that test. It works nice, but I still need to find a way to have more accurate blobs.


Here's the result :


I'll try to work a bit on the laser calibration and on the camera aswell.

Lowering the camera

Ok, now that everything's in place and that the lasers can be correctly used, I had a bit of an issue : with its only 20cm high, the 32" screen couldn't be entirely seen by the camera, even with a fish eye lense...

I thought about adding another camera, but I'm getting short on money, and another camera would mean : the actual camera + IR filter + lense mount + lense.

As the Ikea Ramvik coffee table is roughly 40cm high, which is actually enough for my camera. I then cut a hole inside the table and placed the camera on the ground plank, like this :


To fix the camera, I used an empty DVD box, in which I've cut a hole for the lense : it works quite well !
I can now see the whole display, and can get started for the real stuff...

How to hide the lasers?

I've been searching for quite a long time how to hide the lasers ontop the table, and - of course - how to make them look nice.

I can't remember where, but I saw some months ago a table with some kind of silver knobs, one in each corner, and I thought that it looked amazing. I then starting to look for some empty silver knobs, thin enough to be able to cut a hole in it (for the lasers).

By chance, at work, we received as a gift from some Advertising Network some very fine French tea from Mariage Frères, a famous tea house. And the tops were exactly what I needed....


After gathering four of them, I needed to find a way to place them into the table, so "through" the tempered glass pane. As tempered glass can't be cut, I had to order another pane, just 20cm less long than the original, and I ordered two black glossy acrylic straps, 10cm wide, 5mm thick.

By that time I didn't know that cutting acrylic was a bit complicated, because it actually melts a lot, creating a lot of plastic threads all over.

I then used two wood planks, one on each side of the acrylic, then used a special saw I bought (can't find the English name, a "Bell saw" ?).

Here are some pictures I took of the whole procedure :


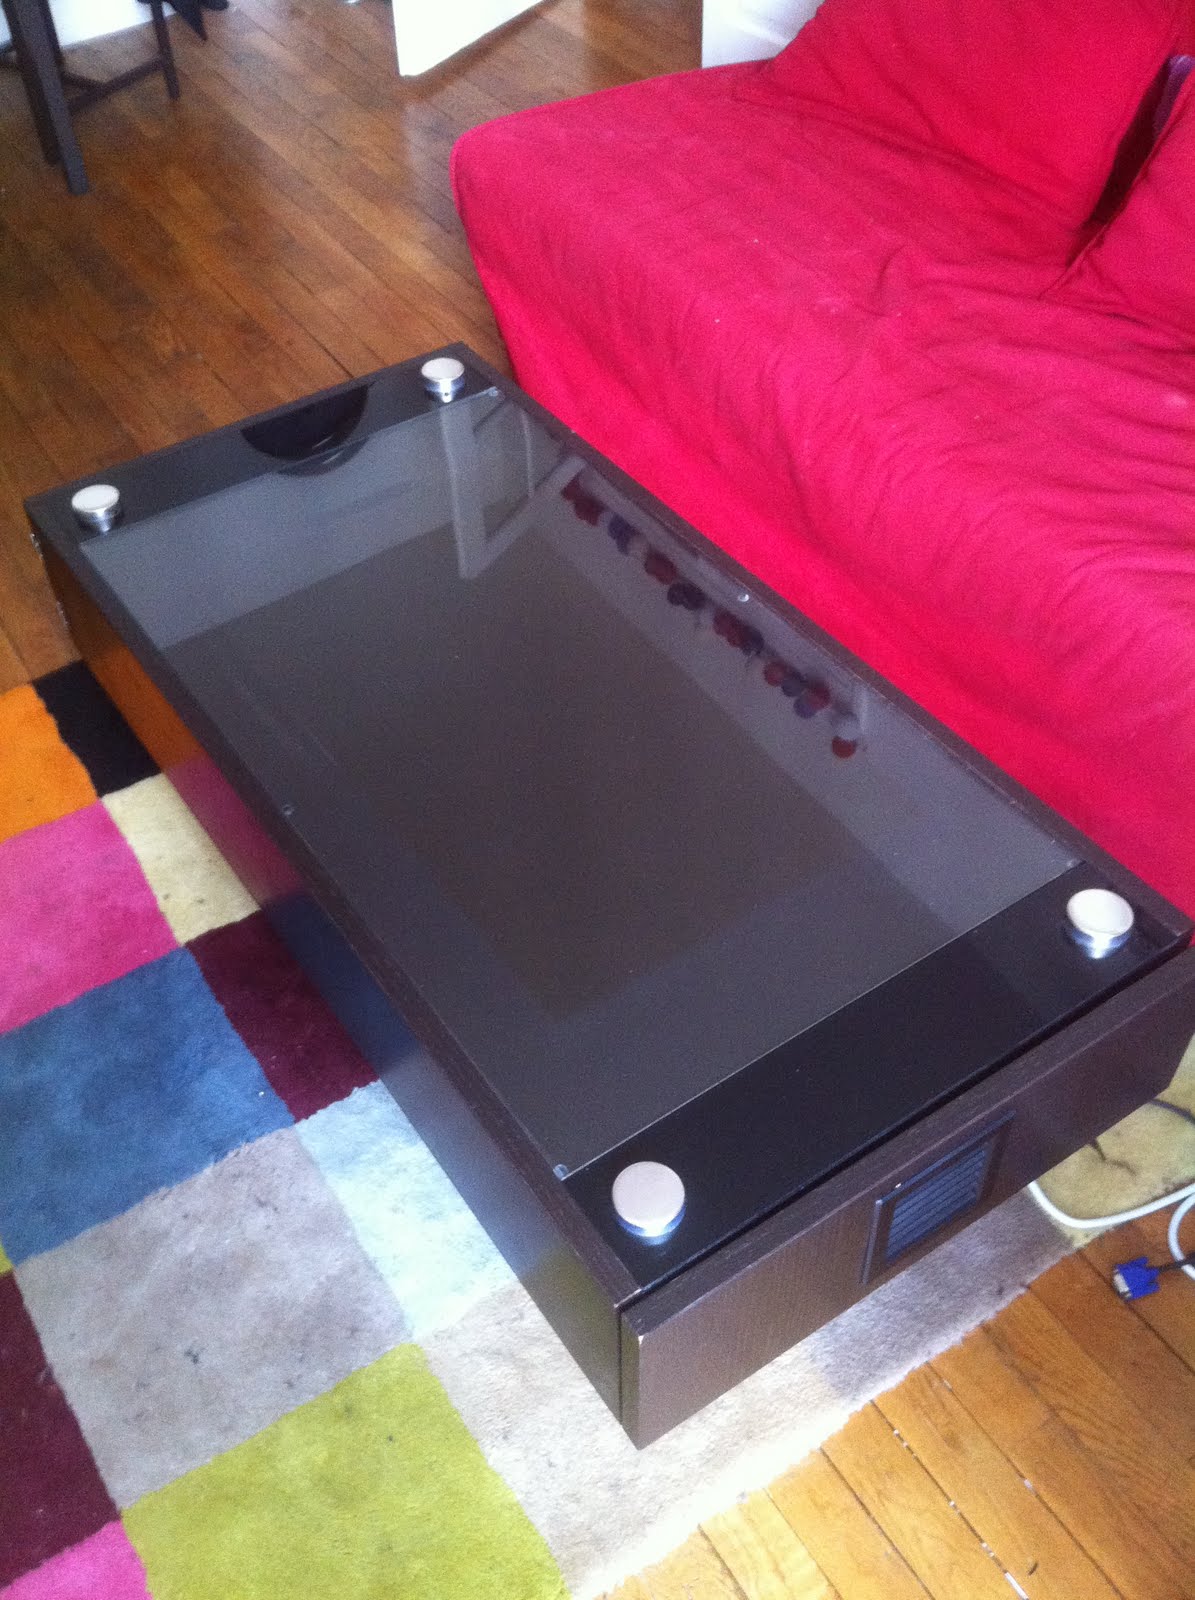
Some polishing and cleaning later, here's the result :

I've go to say that the result is very smart : I wouldn't have thought it would be that clean and nice looking. I just added a hole in each silver knob and that's it !

Some fans to make my table even cooler.

An issue I've been struggling with since the beginning of this project was - of course - the heat. But some fans can be very :
  1. Ugly
  2. Noisy
  3. Unhandy
I've been looking for some nice quiet fans and I just got 2 of some random computer fans from an old PC. They were exactly what I needed. A few shopping hours later, I've bought some stuff to make them nice looking...


 Everything seems ok, the two pieces have exactly the same size.


A couple of cutting later....

 Painted in black it's even nicer


I've bought a noname universal power adaptator which I used with the 9V out, the 12V being too noisy with the two fans.


Here's the powered result on one side.

Friday 8 July 2011

Multimedia & Wires

Ok, the tempered glass pane is ready, I got it earlier yesterday. That's definitely a good thing : I went to a little glass-house near Paris a friend of mine told me about, and it was 40€ cheaper than everything I had found on the internet, and the guy could have it done in 3-4 days. Definitely a nice place to go ! Bringing it back home on my bike was quite a pain in the bum though ('should have taken a picture)... !


Anyway, I've been thinking a lot about "how is the table going to interract with all the stuff I've got in my living room" and I've managed to find (after like litteraly hours of reflexion) a good setup for using the projector + the home theater, all from the table only.


Here's a chart I've done to illustrate the set up : it's the simplest way I've could have done it (the macbook 2008 doesn't have the sound going through the miniDVI port, and thus I couldn't just plug the HDMI cable from the Macbook to the Home Theater... Too bad) :


Everything is ordered (mainly on Amazon.co.uk & Amazon.fr) and I've already received almost all of the cables & devices. The HDMI splitters & Switch are active devices, I've checked a lot of forums before buying ;)

With that set up, I'll be able to control all the music from the table (and then with my actual computer switched off), but also play movies & TV Shows directly from the table too, using my NAS as storage (the projector being over the table, in front of the sofa).


I'll be posting this very weekend with the some pictures & movies... If everything goes well !